< Back to previous page


Rear Bumper Hanger Replacment (Passenger Side)
The passenger side rear bumper hanger was rotten inside and out, so this was replaced with another excelent Wolf repair panel.

To get all the rust off I sandblasted the underside panel. It did a really god job, but made a really big mess!!


Rear Valance Fitment
Next up was the bit I've been saving till last (well nearly last!). Fitting the rear valance!

Due to replacing the bumper hangers on both sides the valance was already out, but the inner seal panel had been left in as a guide, so it was time to remove it!

I used a new panel from Autocraft as I wanted it with a single central exhaust cut out. Big thanks to Karl for getting this exactlly spot on for me.)

As I’m a detail geek, I had to add in the wire holders that run inside the panel! (Yes I know I need to get out more!)

Next up was trial fitment. Notice the panel doesn’t line up very well with the wings, and the gap on the engine lid is way out

However, after a lot of fettling (including reshaping all the edges of the hanger panels where they meet the valence) I got the panel to line up much better! At this stage everything was loosely bolted up to make sure it all fitted right! I love this shot with the T bars on!

However, not all fitted right, and this shot shows how bad the seal channels line up.

This was soon sorted out though! (Sadly I havn't got a photo of the finished panel)

Finally time to weld the rear valence in!

And then grind back and paint!

And finally she’s in! I'm much happier with the final fit now, as the engine lid sits nice, with good small gaps!


Gutter Repair (Passenger Side)
A job I wasn’t looking forward to, I sorted out the passenger’s side gutter. Here's a shot of the gutter.

Although it was generally pretty good, there were two bits that needed sorting out. Here’s how I sorted out one of the said 'bad spots'.

Where the gutter were showing signs of rust, they were opened out, sand blasted (horrible job!), primed with weld through primer and then shut up.

And here's the gutter all finished!


Brake Fluid Reservoir Modification
Right, I finally done something thats worth posting up!

The first part of this was siamising two brake fluid resevoirs together, as the car will be duel circuit, and I didn't want to fit a later plastic reservoiur.

I was actually really pleased with how this looked.

Next up was to cut the wheel well to accept it, and adjust the pressing. I was really nervous about doing as if I messsed it up their was no going back!

Anyway here's how it turned out! I think i'm happy with it!

And all finished off with the reservuir painted and ali hold down bolt.


Vert Engine Lid Restoration
I have always wanted to put a vert decklid on the 58, because I wanted it to get extra cooling, abut also just because I think the look way cool, especially the 58-63 with the horizontal vents and t handles.

Anyway years ago, I managed to find a genuine vert decklid on a trip to the States. However, it was very sun bleached, an at some point it must have been in a accident, as the bottom was way out of shape, and the whole decklid curved like a banana!!

Anyway, enthusiasm took over from common sense, and I brought it and shipped it back to the UK. However, it soon became apparent though that I didn’t have the skills to get it straight enough, as it was gonna be a difficult job, and thus it was sent to Wayne at the Intergalactic Customs 
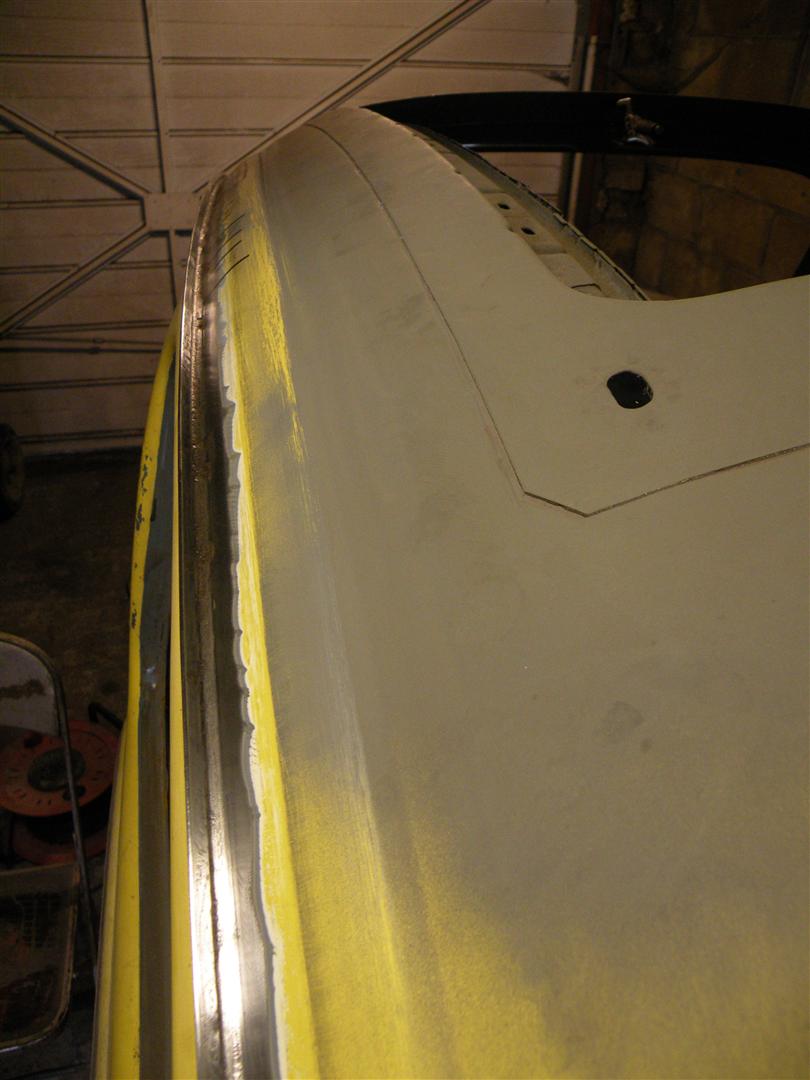
Shop, who did a amazing job of beating the thing back into shape. This picture really doesn’t do his work justice.

Here’s a pic of it on the car. It really fits nice.

Next it was off to my mate good mate Andy at Custom and Classics Paint Shop, who helped me get all the last little wrinkles out. He also did all the paint, which I am well chuffed with.

First of it got a coat of etch primer.

Next up it was time to put a bit a bit of filler in to take out any last little wrinkles. Please note, the photo makes it look like there is a lot more filler in it than there actually is! There is only a thin skim, which is amazing as it looked like it had been steam rollered when I brought it!

And finally it was time to get it into paint! Here’s it in primer.

And here is it finally painted in Fjord Blue.

(Yes I know this photo is upside down! I thought it looked weird the other way up!!)

And finally a shot of the titanium quick release pins fitted. I got these from Joe Bence Enterprises, and they are stunningly well made.


Finished Body
So thats the body finally finished. :-)

As you can tell i'm quite happy :-)

Jump to floorpan restoration >